
User guide · For authorized employer and HR administrators
Manage employees in the employer portal
Use the employer portal to create a funding classification, add employee records or import employees from the provided template. Review the saved records and import results against the accepted plan before confirming enrollment to your team.
Before you start
- An authorized employer account and the portal access instructions provided during activation.
- Accepted employee classes, allowances, waiting periods and claim rules.
- Accurate employee information and the current import template if enrolling a group.
- Screens illustrate the documented CRM workflow; labels and available controls may differ in your account.
Screenshots are earlier Wellbytes interface examples. Follow the labels and instructions in your current account.
At a glance
From plan rules to reviewed employee records
Define the class
Enter the classification and accepted benefit settings.
Add your team
Create one employee or use the import template.
Review the result
Resolve validation errors and confirm the actual records.
Open the employer workspace
Use the employer-portal link supplied in your activation instructions. The Wellbytes website’s Login route opens v2.crm.wellbytes.ca/login. Sign in with your authorized employer account and confirm that you are working on the intended company.
This guide covers company administration in the web workspace. Employees use the Wellbytes app for their personal claims, banking and dependant records.
Create a funding classification
Open Funding Classification and select Create. Enter the class identity, employer and benefit settings. Use the field reference below to check every illustrated setting against the accepted plan.
A classification groups the rules that apply to participants. Review the employee type, waiting period, reimbursement timeline, carry-over, proration and benefit amounts together before saving.
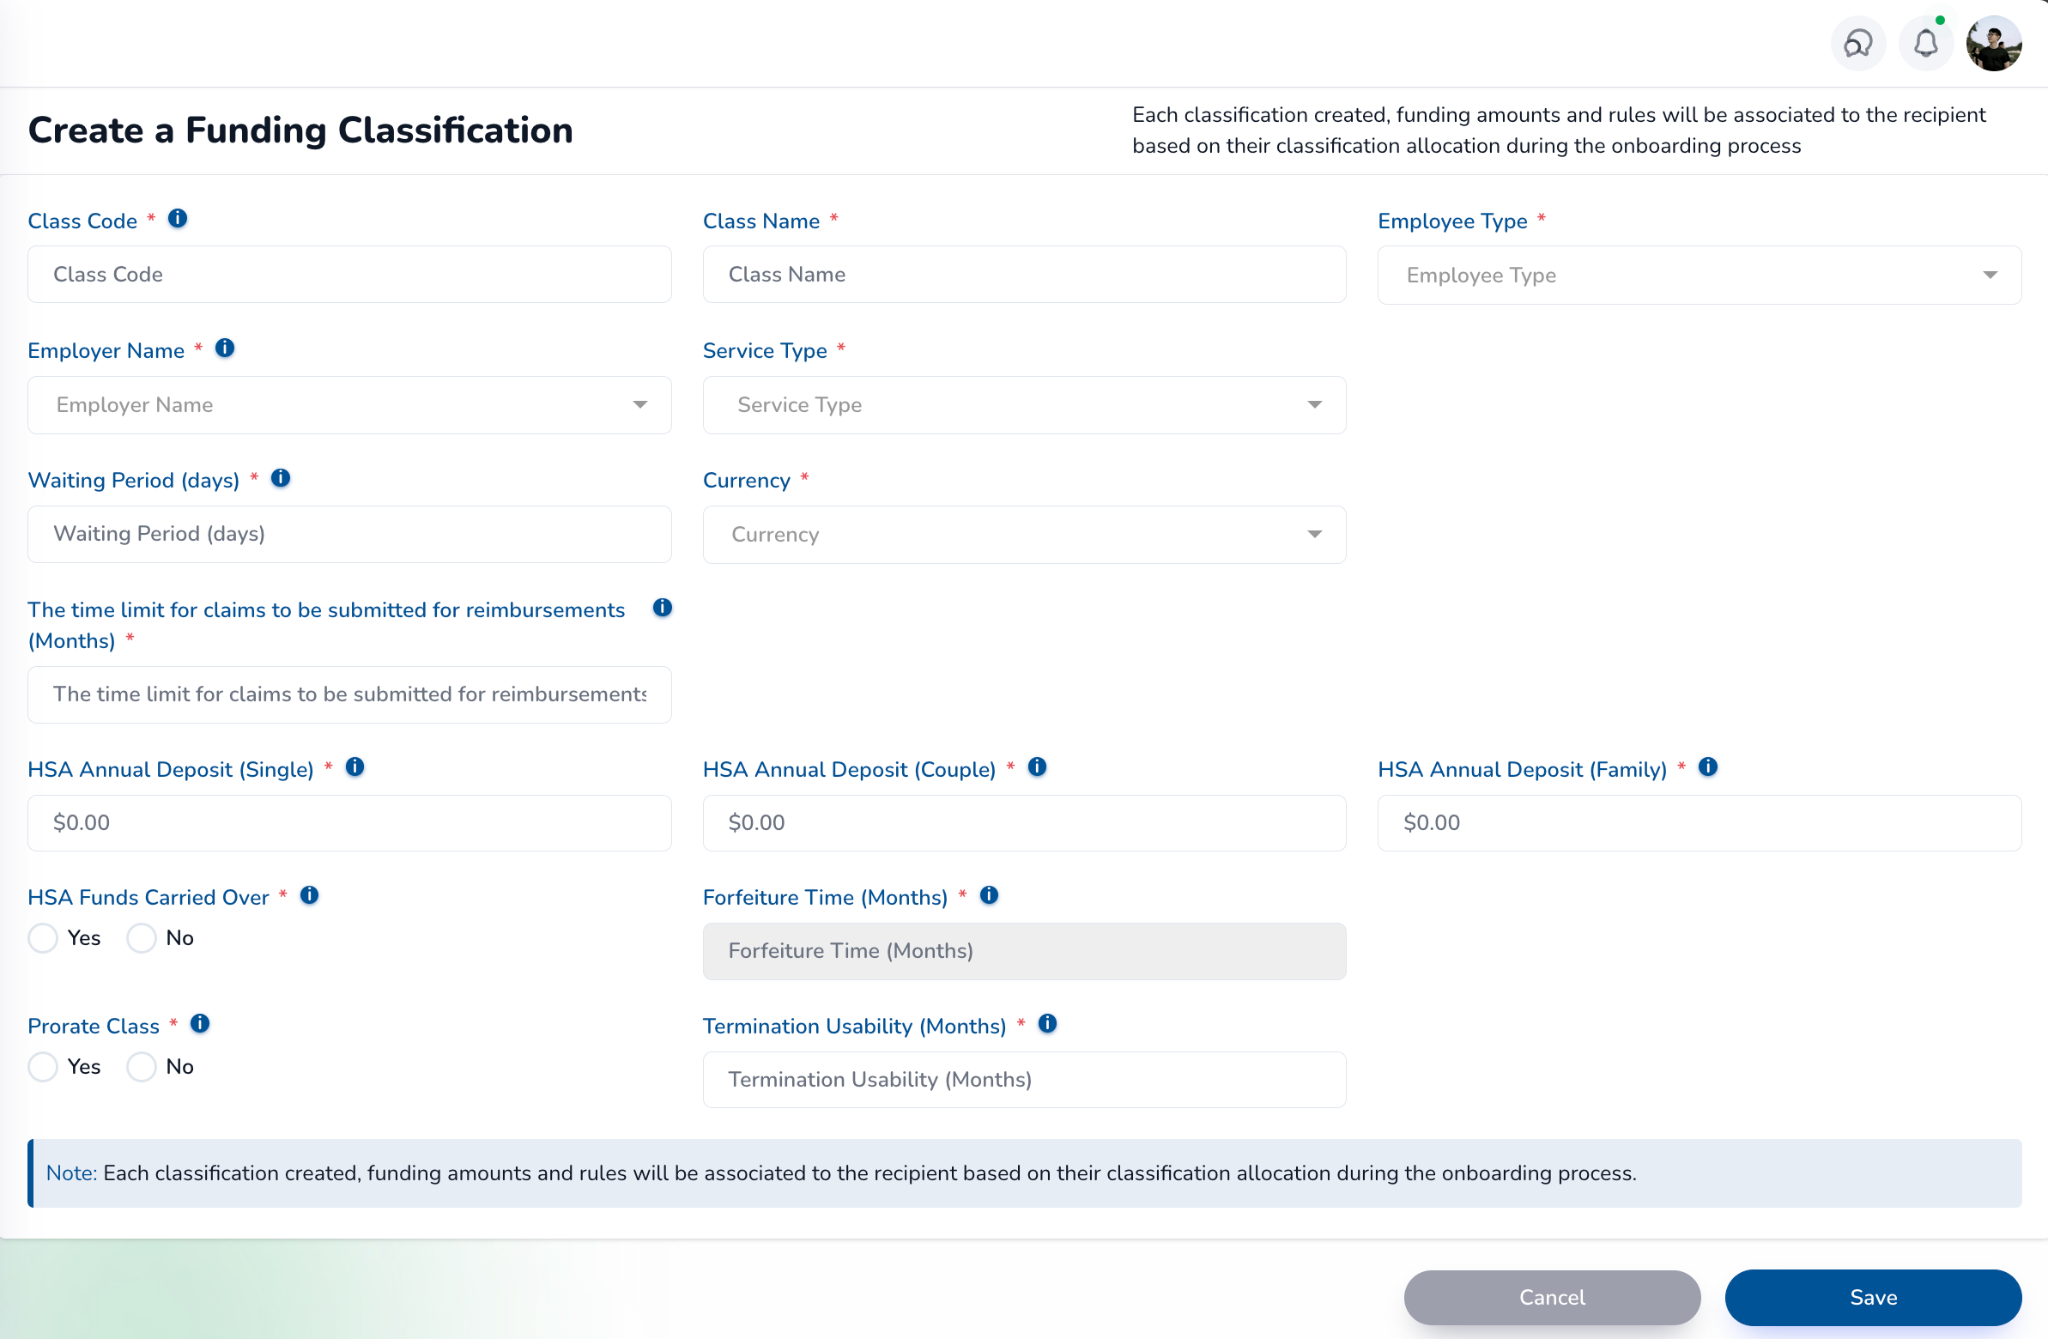
Review and save the classification
Check the completed classification, then use Save to create it. Review the resulting record before assigning employees to the class.
Carry-over must follow the accepted plan and applicable PHSP conditions. A control in the interface does not authorize unlimited accumulation or carrying forward both credits and expenses.
Add one employee
Open Employees and select Create. Complete the required information for the intended employee, review the entry and select Save.
Check the saved employee record against the company, intended class and enrollment information. A record or an Employee Type label alone does not establish employment status, PHSP eligibility or active benefits.
Prepare an employee import
For several employees, open the arrow beside Create on the Employees screen and choose Import Data. This opens the Multi Employee Enrollment Form.
Download the provided template using the here link in its note. Enter the required employee information in that template and check the records against your intended employee list before uploading.
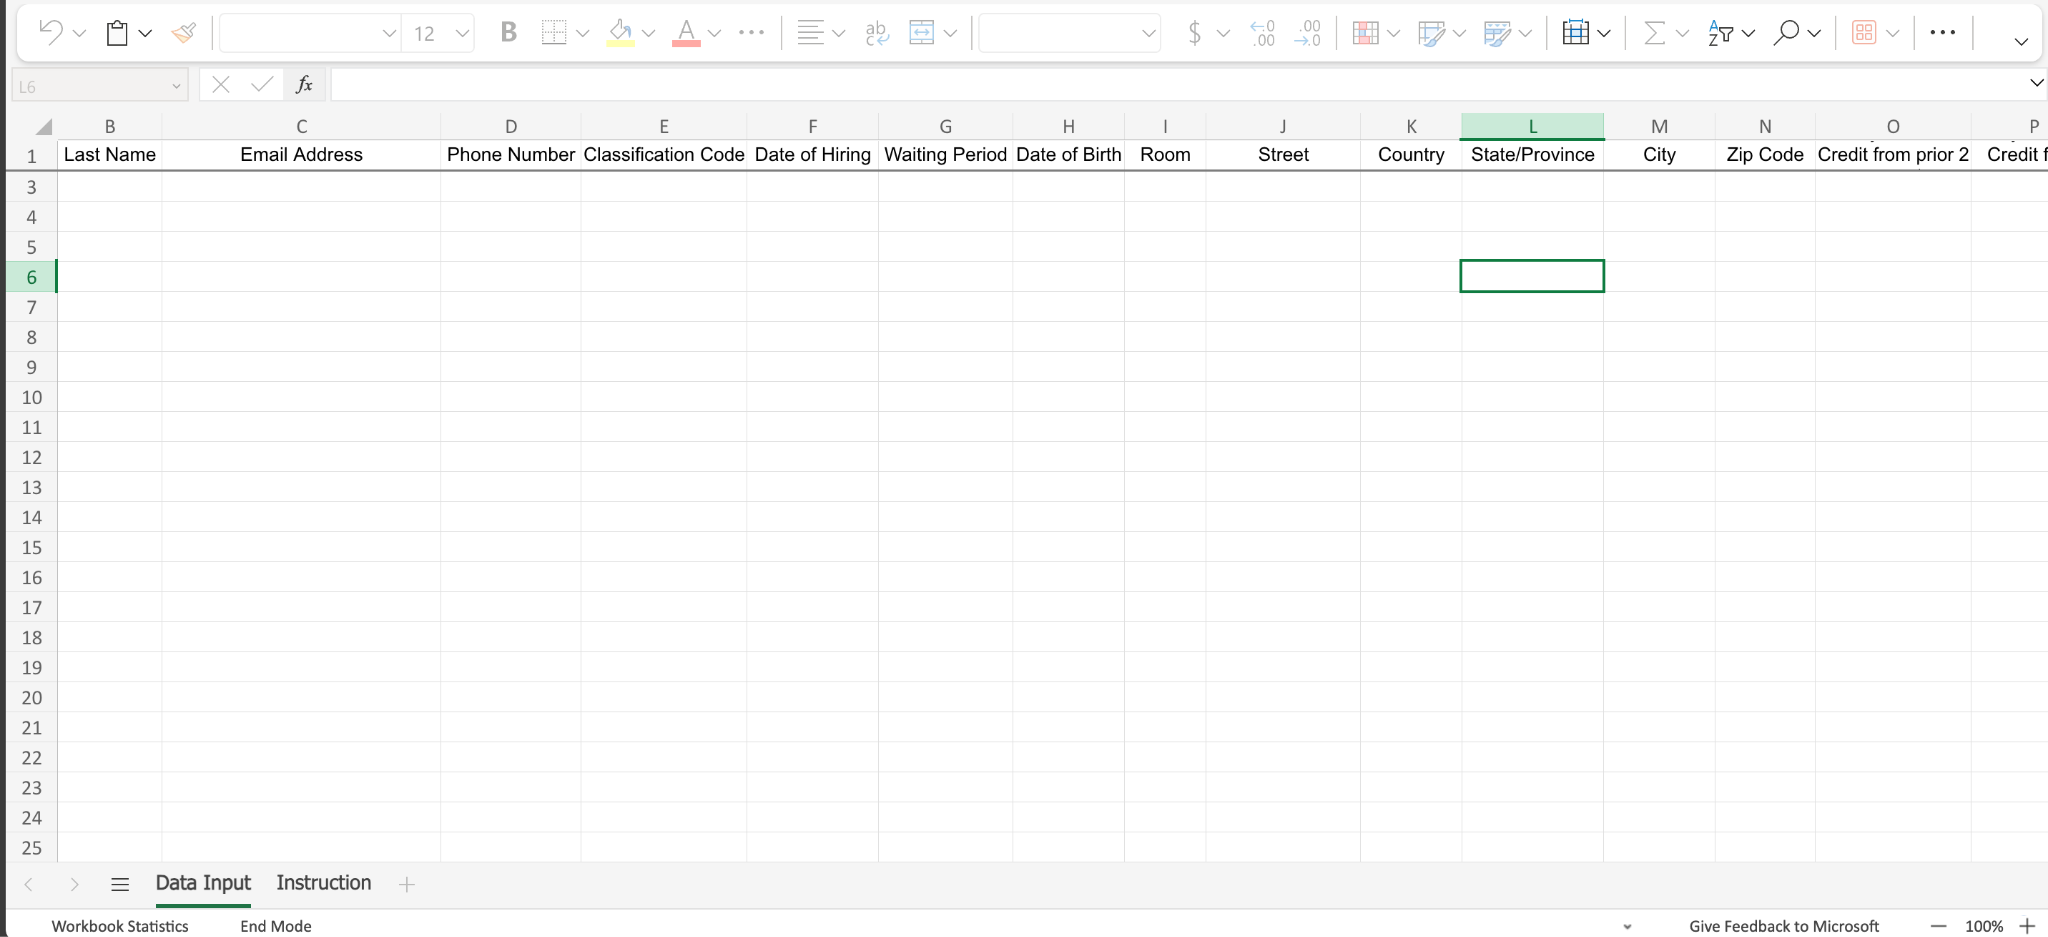
Upload and execute the import
In the Multi Employee Enrollment Form, choose Upload Data Input and select the completed template. Select the Corporation that should receive these employee records, then choose Execute.
Review the import result and every validation error before relying on the records. Resolve reported errors through the authorized administration process and retain the completed import result.
Review enrollment before notifying employees
Reconcile the employee records with the intended roster and accepted plan. Confirm the applicable class, coverage date and any remaining activation or access steps before telling employees their benefits are ready.
Import completion records a data operation. It does not guarantee a review time, automatic activation or approval of later medical claims.
Funding classification field reference
The documented form shows these 15 fields. Use the accepted plan to determine their values and keep the displayed units distinct.
| Field | What to check |
|---|---|
| Class code | The code identifying the classification. |
| Class name | The name used for the employee group. |
| Employer name | The employer establishing this class. |
| Employee Type | The category under the actual plan; a contract label does not determine employee eligibility. |
| Service Type | The service or benefit type available for this classification; match it to the accepted plan. |
| Waiting Period | The applicable waiting period and its stated units. |
| Reimbursement Eligibility Timeline | The claim eligibility timeline specified by the plan. |
| HSA Funds Carried Over | The carry-over choice permitted by the plan and applicable rules. |
| Forfeiture Time (Months) | The expiry or carry-forward period under the accepted rules; confirm its relationship to available benefits. |
| Prorate Class | Whether the class funding amount is prorated. |
| Termination Usability (Months) | The period permitted under the plan after termination; check expense dates and claim-submission deadlines separately. |
| Currency | The currency for the funding amounts. |
| HSA Annual Deposit (Single) | The amount for Single coverage. |
| HSA Annual Deposit (Couple) | The amount for Couple coverage. |
| HSA Annual Deposit (Family) | The amount for Family coverage. |
Handle later employee changes under the plan
For a new hire, coverage change or departure, check the effective date, class, allowance, proration and outstanding-claim rules before requesting or recording a change. Use the authorized process available for your account and retain confirmation of the result.
Confirm the available employee-change and reporting controls in your account when planning ongoing administration. If a required control is unavailable or its effect is unclear, ask Wellbytes to confirm the appropriate next step.
Before you finish
- The company and classification are correct, with all plan settings reviewed.
- Individual employee entries or imported records match the intended roster.
- Import validation errors are resolved and the result is retained.
- Enrollment, coverage and remaining access steps are checked before employee communication.
Resolve a problem
| What you see | What to check |
|---|---|
| The import reports validation errors. | Review the reported rows and fields against the supplied template, resolve them through the authorized process and check the result before relying on enrollment. |
| A saved employee does not have the expected benefit. | Check the company, class and coverage records, then use the activation guide to separate access, eligibility, allowance and funding. |
| A classification rule or later HR change is unclear. | Check the accepted plan and ask Wellbytes to confirm the intended setting or administration process before changing it. |
