
How It Works · Self-Onboarding
How to self-onboard and activate your HSA
Enter your business details, choose your plan and budget, then review and sign online. Follow the confirmation’s review, payment and activation instructions before employees use their benefits.
Before you start: get these details ready
Have your business records and plan choices handy. You can begin without your business number, but you’ll need it before activation.
Your business details
- Official corporate name, exactly as it appears on registration.
- Registered office address, country, province, city and postal code.
- Your 9-digit CRA Business Number: optional to start; required for activation. Find it on CRA correspondence or in My Business Account.
Your contact and signer
- Contact first and last name.
- Phone number, including the country code.
- Work email address, entered twice to confirm it.
- An authorized representative to review and electronically sign the agreement.
Decisions you’ll make during setup
- Who the plan covers: your team or your incorporated-professional arrangement.
- HSA, WSA or a combined program, including the account split where applicable.
- Employee headcount and the annual benefits budget.
- A ready-made package or custom settings.
- Administration-fee billing, funding method and any reserve shown.
- Annual or monthly benefit distribution, where offered.
- Employee classes, class percentages and family-status coverage weights.
- Eligibility, waiting-period, carry-over and claims-submission rules.
Documents and signing
- Keep corporate registration and CRA records handy to copy the correct business details.
- No file uploads are required in this self-onboarding flow.
- Review the plan and agreement online, then provide the authorized electronic signature.
- Read the submission confirmation for review, invoice/payment and account-access instructions.
Follow the setup steps
Work through the steps, then review your plan before signing.
01
Enter and review your business details
On Tell us about your business, complete the business and contact fields. Choose Continue, then check both sections on Review your details.
Enter your official Business Name and Registered Office Location, then country, province, city and postal code. Your 9-digit CRA Business Number is optional to start and required for activation.
Provide the contact’s first and last name, phone number, email and Confirm Email. On the review screen, use Back to correct an error or Continue when the details are right.
Ready when: The business and contact details match your records.
02
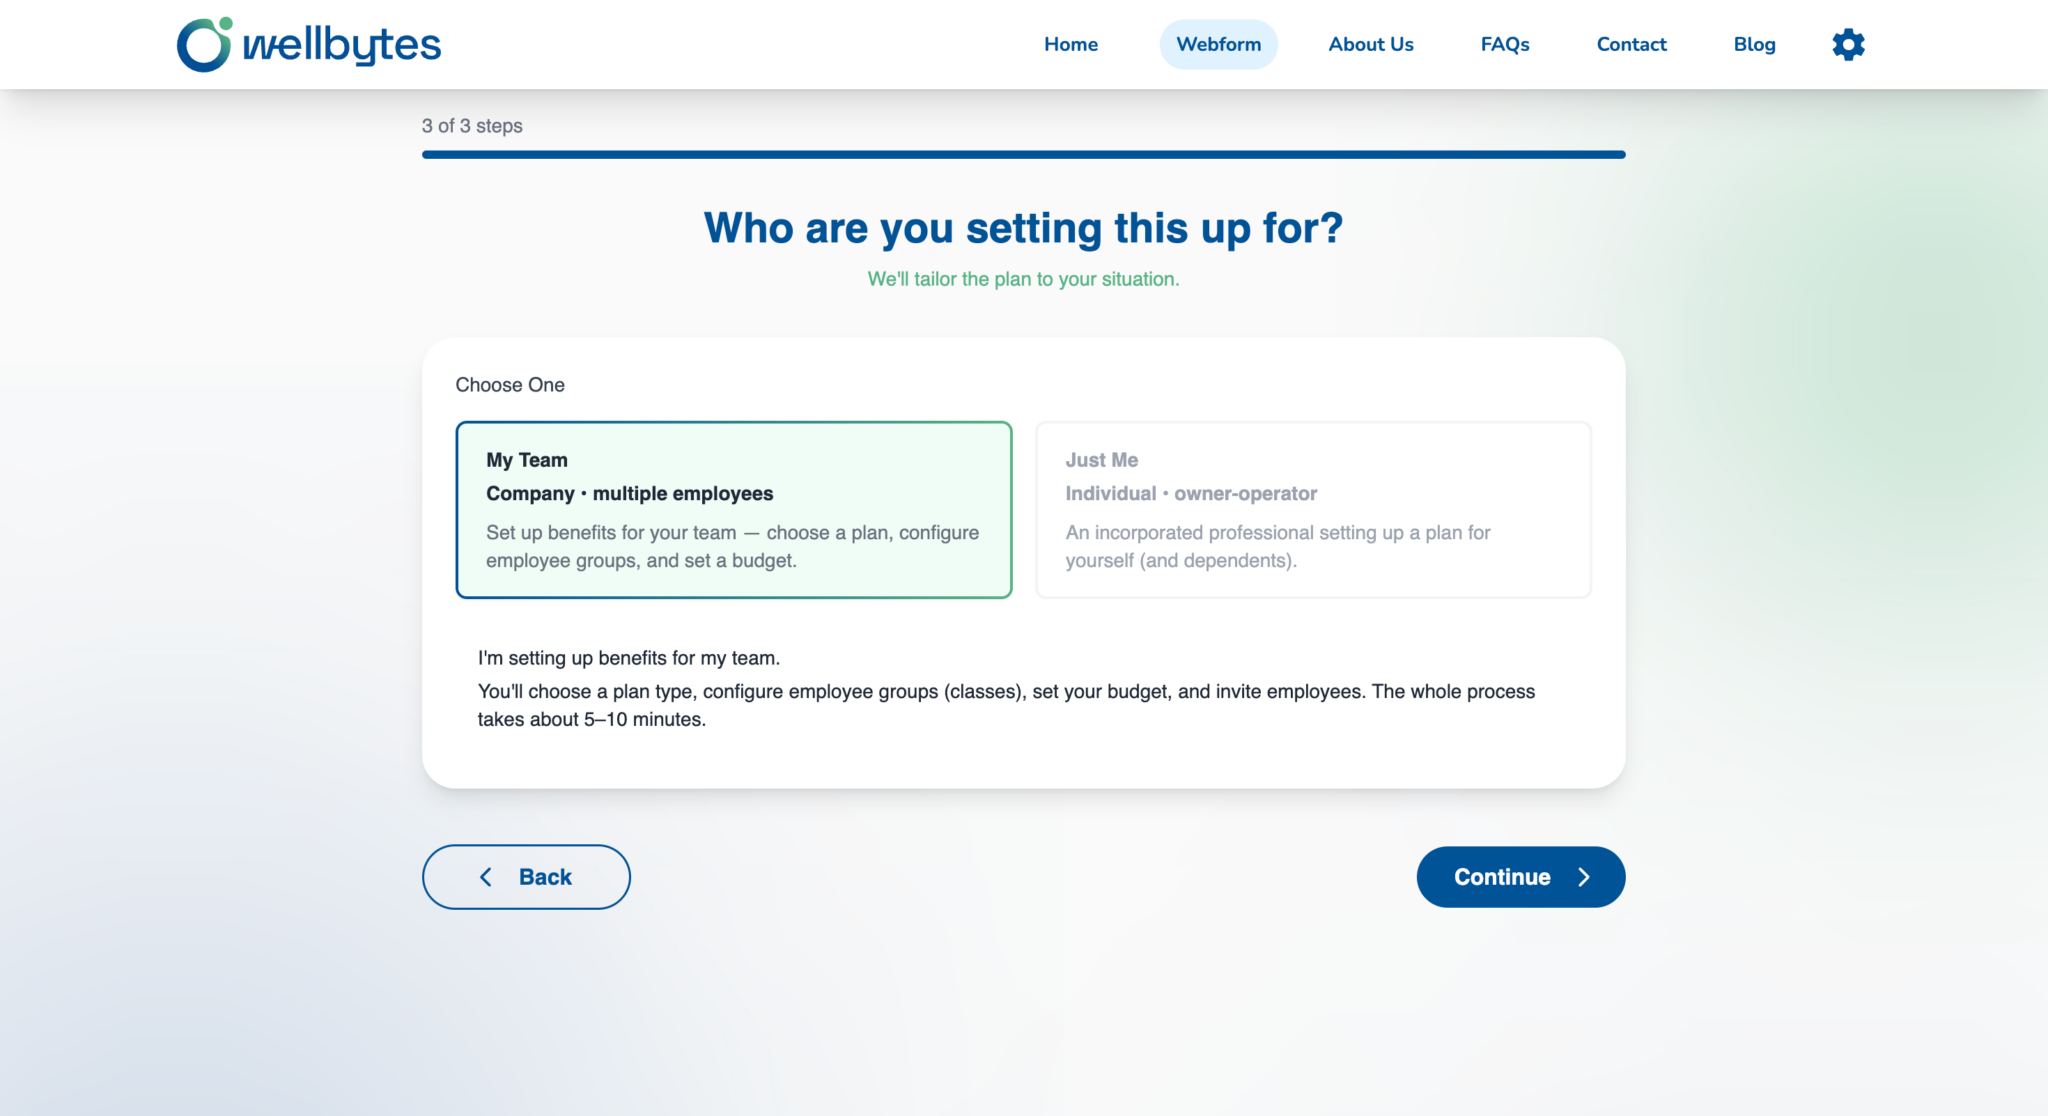
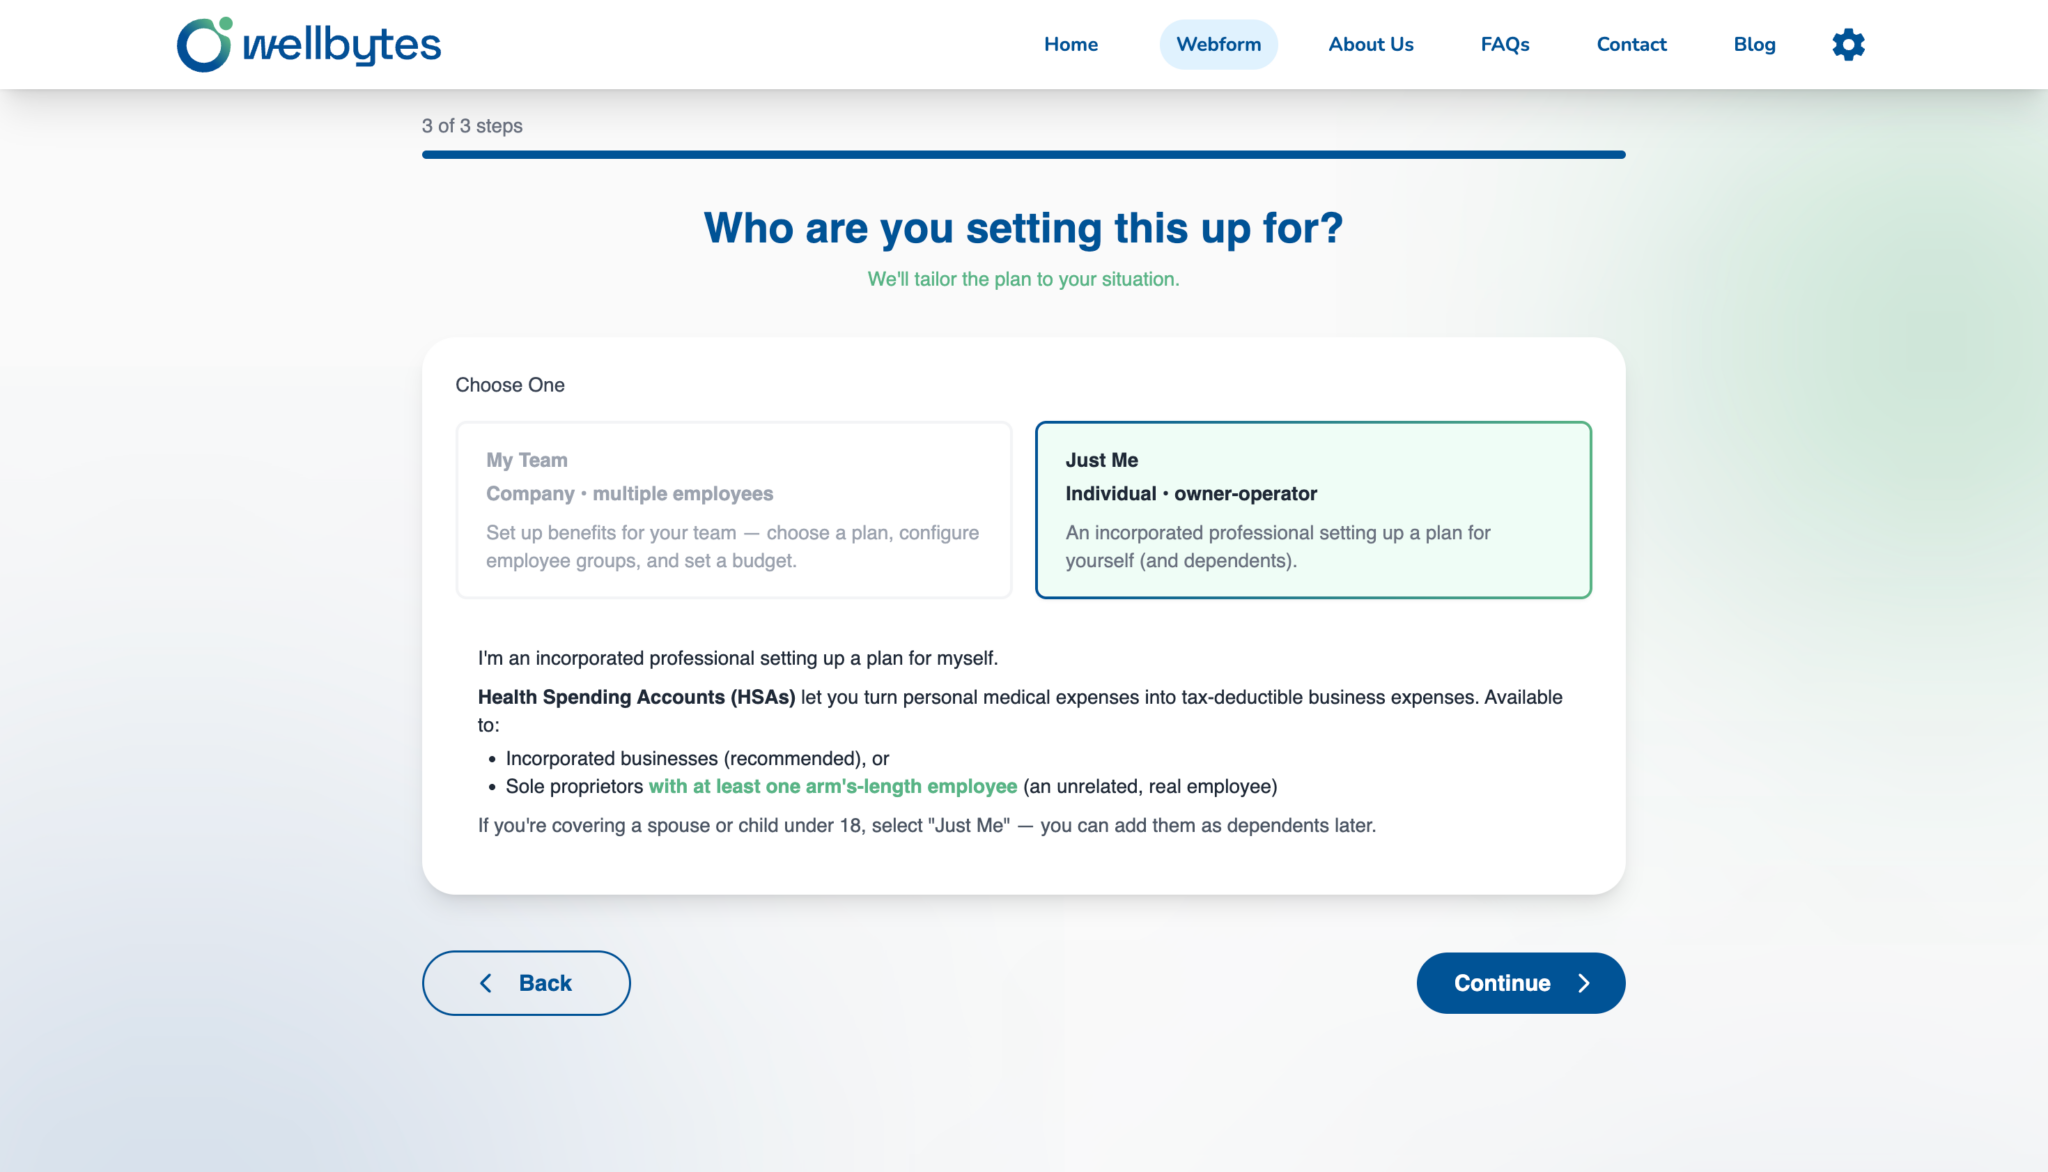
Choose My Team or Just Me
On Who are you setting this up for?, select My Team for a company with multiple employees, or Just Me for your own incorporated-professional plan. Choose Continue.
My Team is the route shown for setting up employee benefits. Just Me is shown for an incorporated professional setting up a plan for themselves and eligible dependants.
This selection directs setup; it does not determine legal eligibility. If your business or participant situation does not fit either description, confirm the appropriate arrangement with Wellbytes.
Ready when: The chosen route reflects who the business intends to cover.
03
Choose a package, program and budget
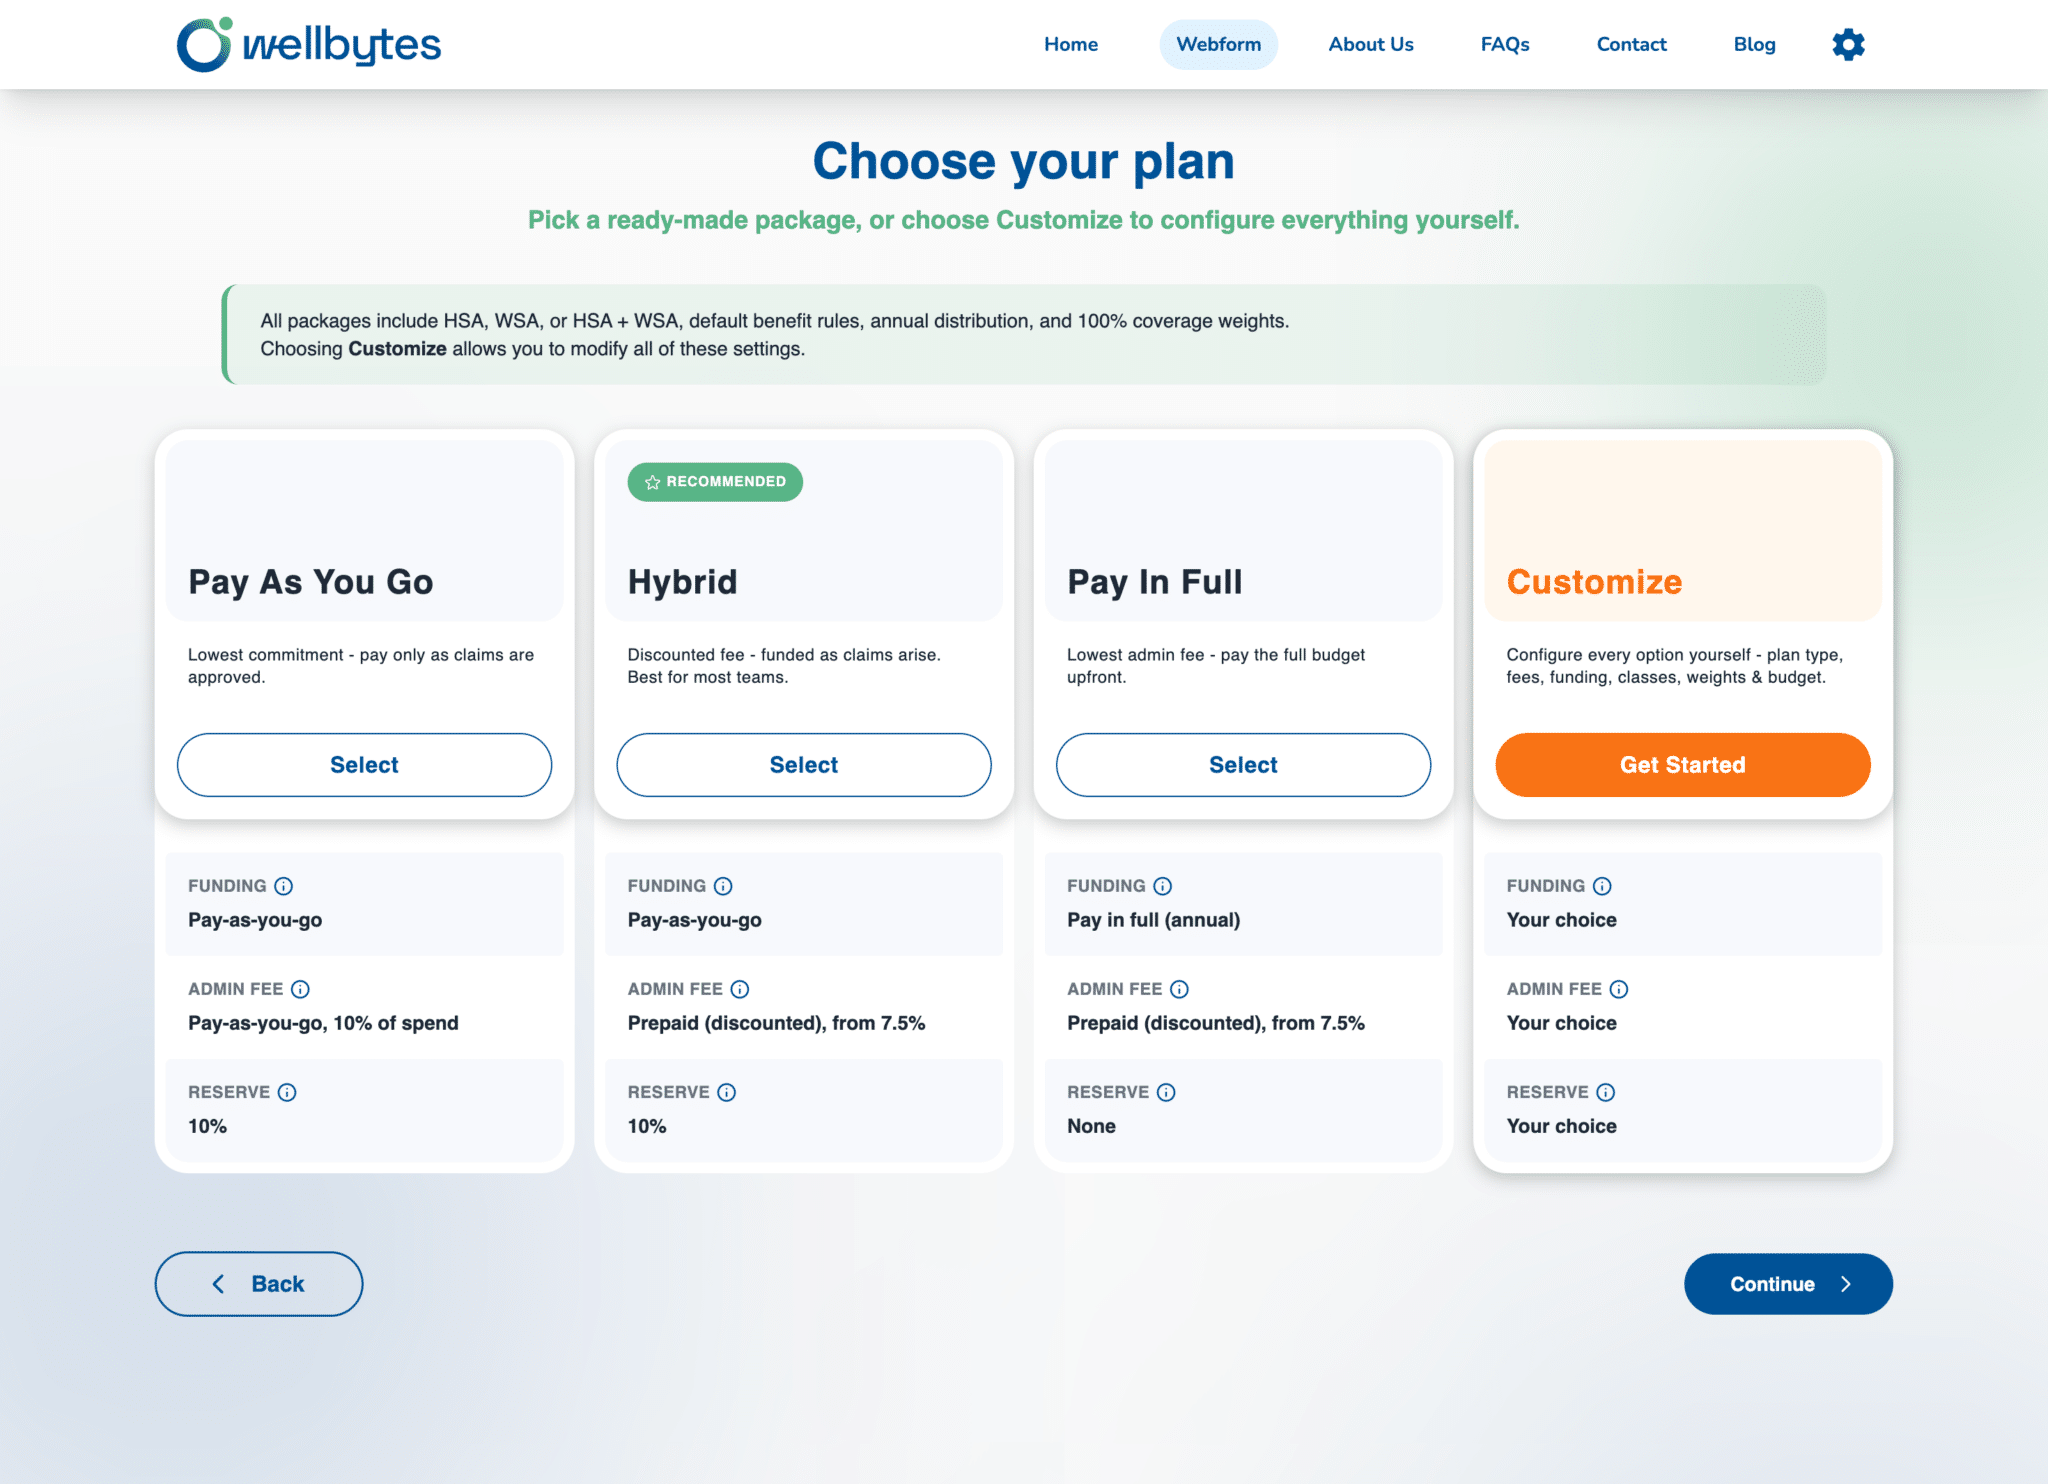
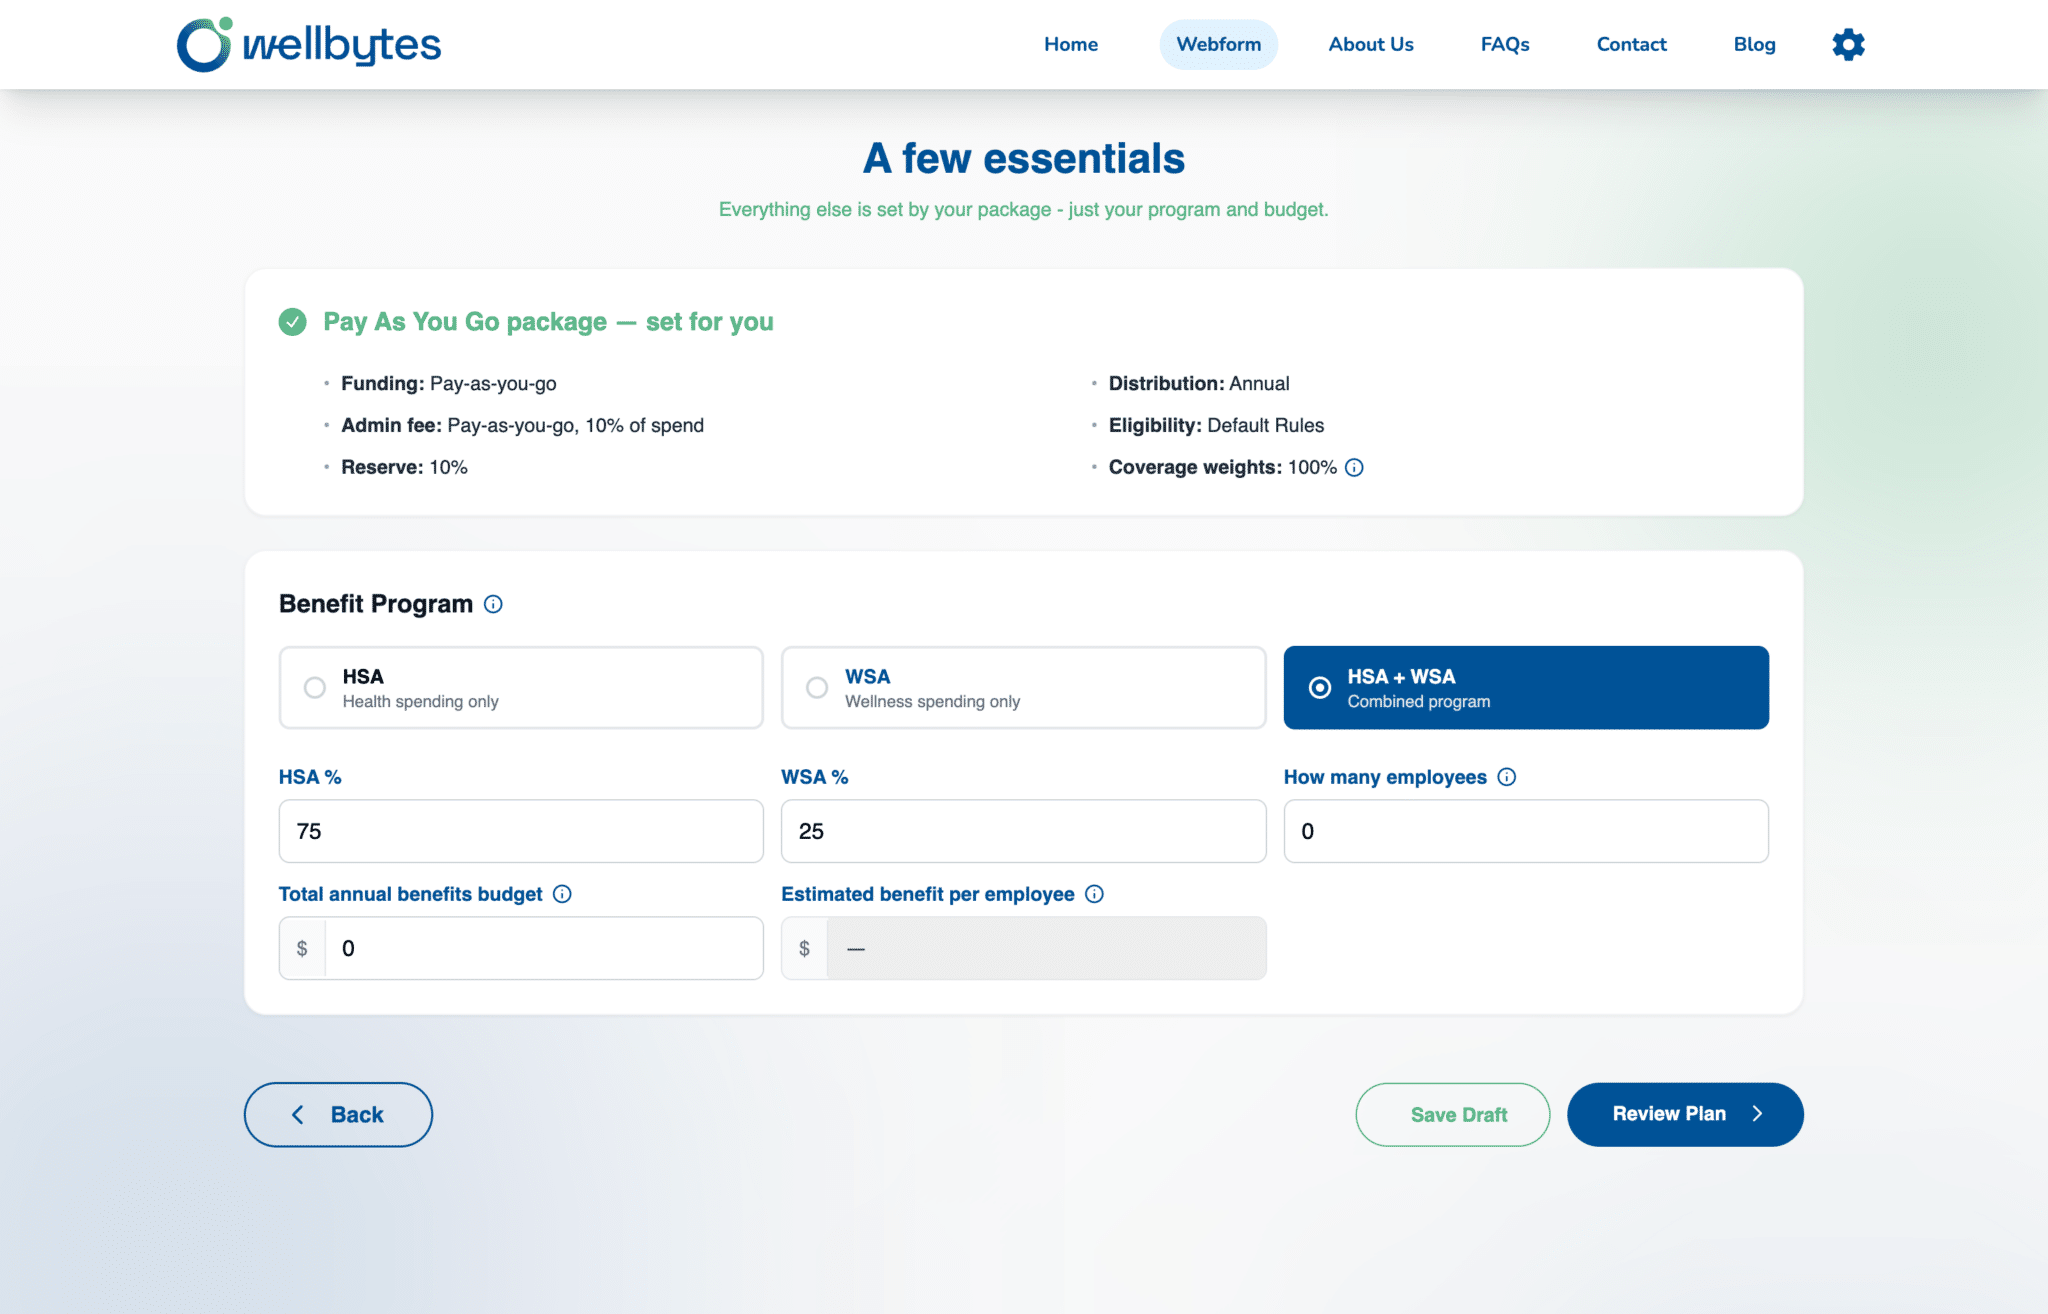
On Choose your plan, select Pay As You Go, Hybrid, Pay In Full or Customize. For a ready-made package, complete the fields on A few essentials.
Ready-made packages display funding, administration-fee and reserve settings. Choose the package that fits your business; use Customize when you need different settings.
Under Benefit Program, select HSA, WSA or HSA + WSA. The combined option shows HSA % and WSA %. Enter How many employees and Total annual benefits budget, then review Estimated benefit per employee and choose Review Plan. Save Draft is also shown on this screen.
If you choose Customize, the same A few essentials page presents the full program, fee, funding, rule, employee-class, family-weight and budget sections before Review Plan.
Ready when: The package, benefit program, participant count and budget reflect the intended plan.
04
Review the plan and sign the agreement
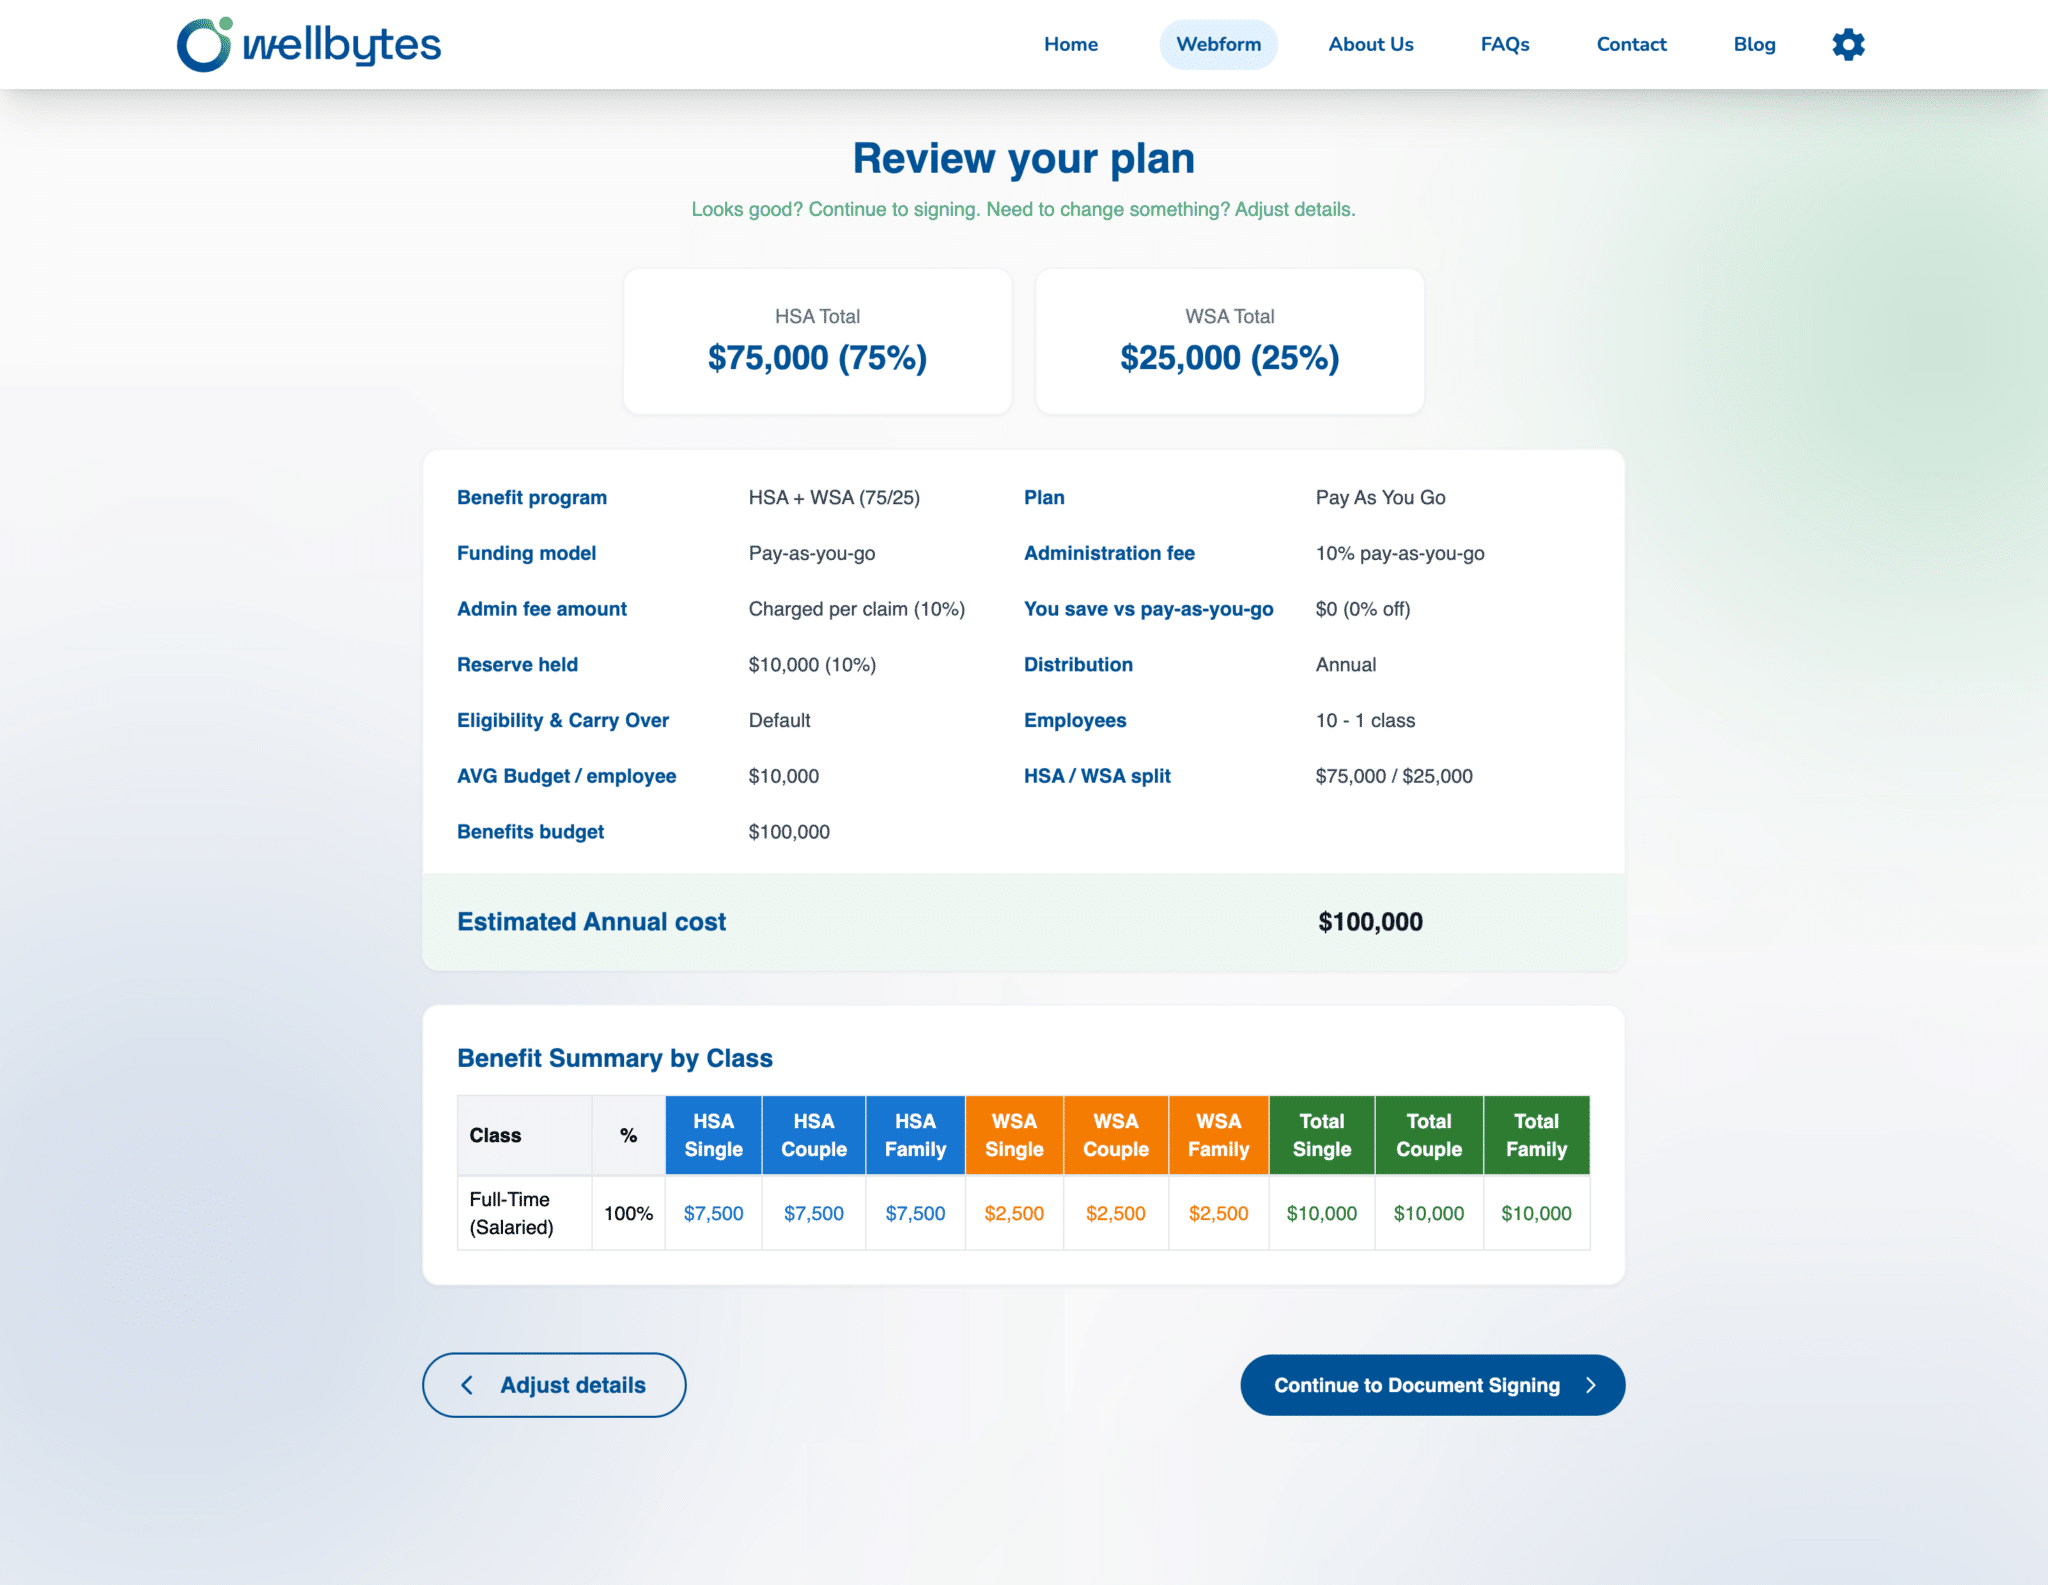
On Review your plan, check the summary and class amounts. Use Adjust details for corrections, or Continue to Document Signing to open Complete and Sign.
Review the program, funding model, administration fee, reserve, distribution, eligibility/carry-over summary and Benefit Summary by Class. Confirm fees and taxes separately; a displayed budget should not be assumed to include every charge.
Read the agreement. The E-Signature area offers Draw, Type and Clear. The authorized representative should sign, review the required acknowledgements, and choose Submit only when ready to accept. Product-update communications are marked optional.
Ready when: The authorized representative has checked the plan and submitted the signed application.
05
Read the submission confirmation
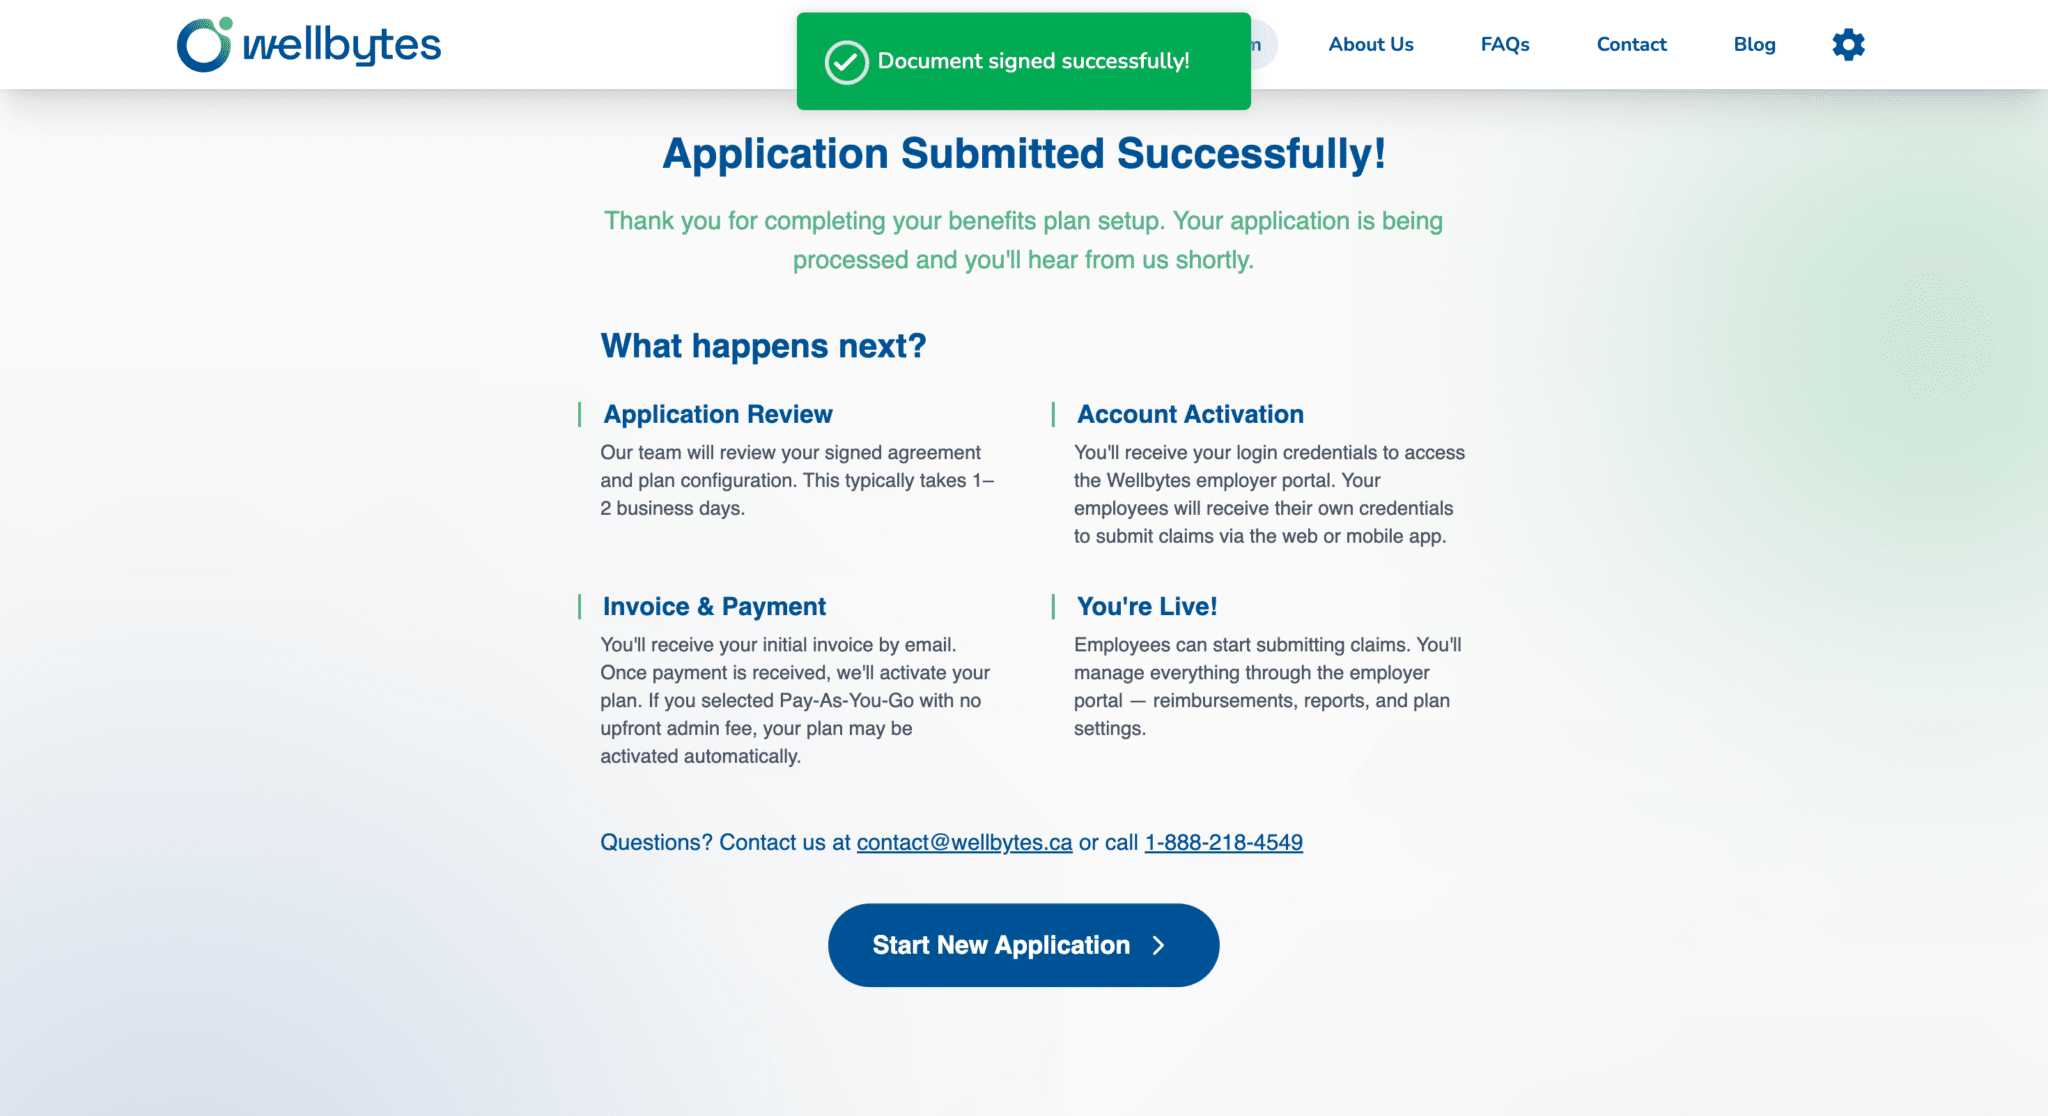
Check for Application Submitted Successfully! and read What happens next? Keep the confirmation and follow the application review, invoice/payment and account-activation instructions.
The confirmation describes review of the signed agreement and configuration, followed by the applicable payment and activation steps. Watch for employer and employee access instructions.
A submitted application is a separate milestone from an active plan. Confirm readiness before telling employees to submit claims. If you are unsure whether submission succeeded, contact Wellbytes before starting another application.
Ready when: You know the next action for your application and how activation will be confirmed.
Before you finish
Use these checks to identify anything that still needs attention.
Business details and My Team/Just Me route checked.
Package, program, budget and class summary reviewed before signing.
Submission confirmation retained; payment and access instructions understood.
Common questions
Check these details before you finish.
Is the business number optional?
The initial screen allows you to leave Business Number blank, but labels it required for activation. Have the correct number ready before the plan is activated.
Does Submit activate the plan?
Submit sends the signed application. The confirmation then describes application review, payment and account activation. Follow those instructions rather than assuming benefits are immediately available.
Do I need to upload documents?
No file uploads are required during self-onboarding. Keep your registration and CRA records nearby for the business details, then review and sign the agreement online.
